
Last Updated / Reviewed: Aug 17th, 2021
Execution Time: ~10-20 minutes
Goal: To add the Snapchat pixel to your site.
Ideal Outcome: The Snapchat pixel is properly installed without any technical issues.
Prerequisites or requirements: You’ll need access to an active Snapchat Ad account. Also, you’ll need access to Google Tag Manager (GTM) that was set up on your website.If you don’t have a Snapchat Ad account, sign up here.
If you haven’t set up Google Tag Manager, refer to the following SOPs:
– Set up Google Tag Manager on WordPress
– Set up Google Tag Manager on Shopify
– Set up Google Tag Manager on Squarespace
Why this is important: Snapchat Pixel allows you to drive direct response goals, such as driving leads, Subscriptions, or product sales.
Where this is done: In Google Tag Manager and Snapchat Ads Manager.
When this is done: Before you run any Snapchat advertising campaign on your website. You only need to do this once unless you’re running Snapchat ads on multiple websites.
Who does this: The person responsible for website management, analytics, or paid advertising.
● Environment Setup
Before you start:
1. Open a new Chrome window with your Snapchat Ad and Google Tag Manager account signed in.
2. Download Snapchat Pixel helper.
● Generate Snapchat Pixel
1. Sign in to Snap Ads Manager.
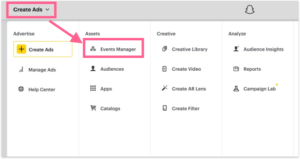
2. Select the menu in the top left corner and click “Events Manager”.
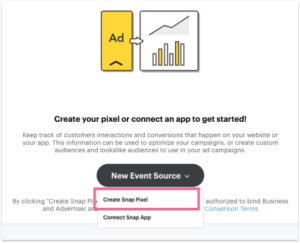
3. Click ‘New Event Source’ and select ‘Create Snap Pixel.’
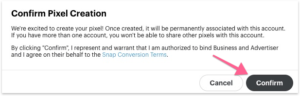
4. Confirm Pixel creation.
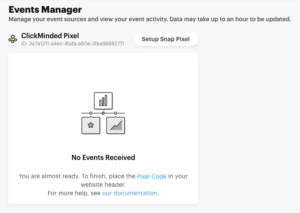
5. Refresh the page and you will see the new Pixel created.
a. Note: It may take a few minutes before the new Pixel is created. If you don’t see it, wait a few minutes and refresh the page again.
● Copy Snap Pixel ID
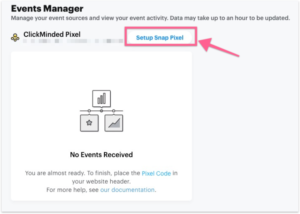
1. In “Events Manager”, click “Setup Snap Pixel”.
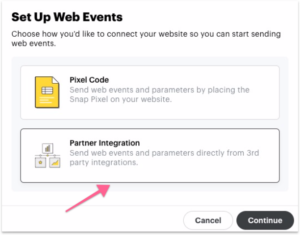
2. Select “Partner Integration” then click “Continue”.
3. Copy the Snap Pixel ID and paste it in a notepad or text editor where you can access it later.
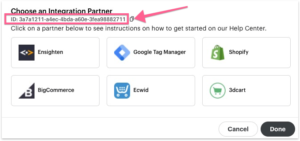
4. Click “Done”.
● Add Snapchat Pixel via Google Tag Manager
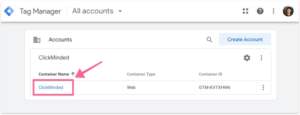
1. Sign in to Google Tag Manager (GTM). This should be the same GTM account used to set up your website. You should see your website listed under Container Name.
2. Click the container where you want to add the Snapchat Pixel.
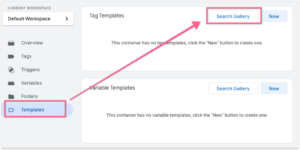
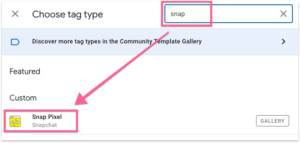
3. Then select “Templates” and click “Search Gallery”.
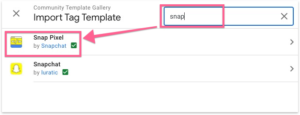
4. Search for “Snap” and select “Snap Pixel by Snapchat”.
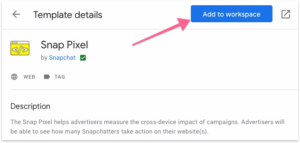
5. Add Snap Pixel to workspace.
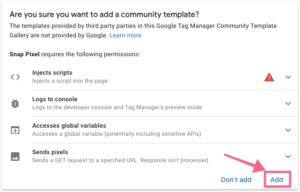
6. A confirmation message will pop up, click “Add”.
a. Note: You will notice a warning sign next to “Inject Scripts”. This is fine since we need Snapchat to insert a script (i.e the Snap Pixel) on our website.
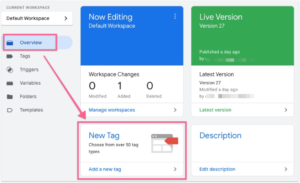
7. Head back to the Google Tag Manager dashboard by clicking “Overview”, then click “New tag”.
8. Rename the tag then click the tag icon.
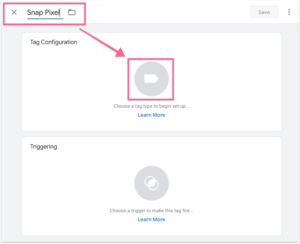
9. Search for “Snap” in the top right corner and select “Snap Pixel”.
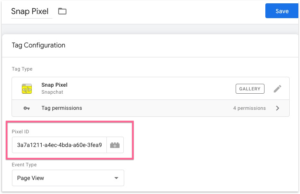
10. Paste the Snap Pixel ID (which you saved in a notepad or text editor earlier) into the Pixel ID field and click “Save”.
11. Now click the trigger icon.
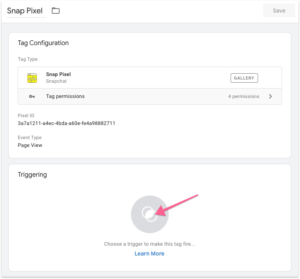
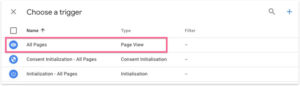
12. Select All Pages. This tells GTM to fire the Snap Pixel on all pages. Alternatively, you can create a custom trigger with the “+” on the right top.
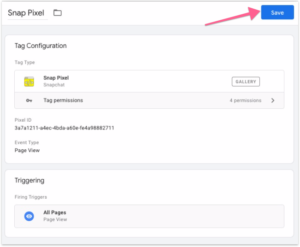
13. Save this new tag that you’ve just created.
14. Now in the Google Tag Manager dashboard. Check if the Snap Pixels are added and hit the submit button.
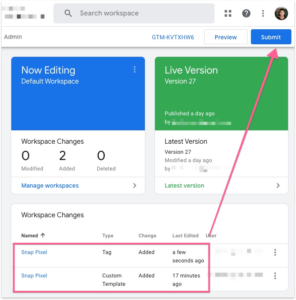
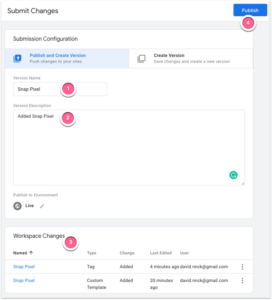
15. Before you publish:
a. Name this change you’re about to make.
b. Write a description for this change.
c. Double check that the Snap Pixel is in the “Workspace Changes”.
d. Hit “Publish” once everything checks out.
16. You have now set up the Snap Pixel on your website.
● Verifying the Snapchat Pixel is installed correctly
Important: It takes a few minutes for Google Tag Manager to fire the Snap Pixel
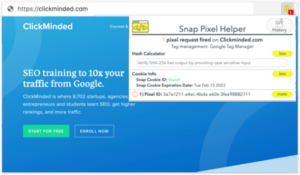
1. Head over to your website where the Snap Pixel is implemented.
2. Click the Snap Pixel helper In your Google Chrome toolbar, you should see the snap pixel is now firing.
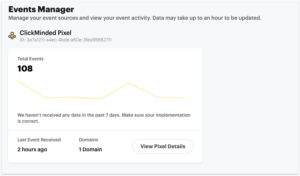
3. Now head back to Snapchat Events Manager and you’ll see the page view metrics now tracked.
a. Note: The Pixel data may take up to an hour to be updated.
4. You’ve done it! Now that you’ve started tracking page views across your website, you can set up tracking for other metrics such as add to cart and purchase events.