Transcription #
Introduction #
In this video, I’m going to show you how to edit and update your pages.
So once you’ve logged into the Mars Digital website, you will see this right here. So this is your dashboard. You need to look at the lefthand navigation and find this one here, pages. So this is going to be a slightly different order for everybody. But amongst that, you will find Pages and it should be about a third from the top.
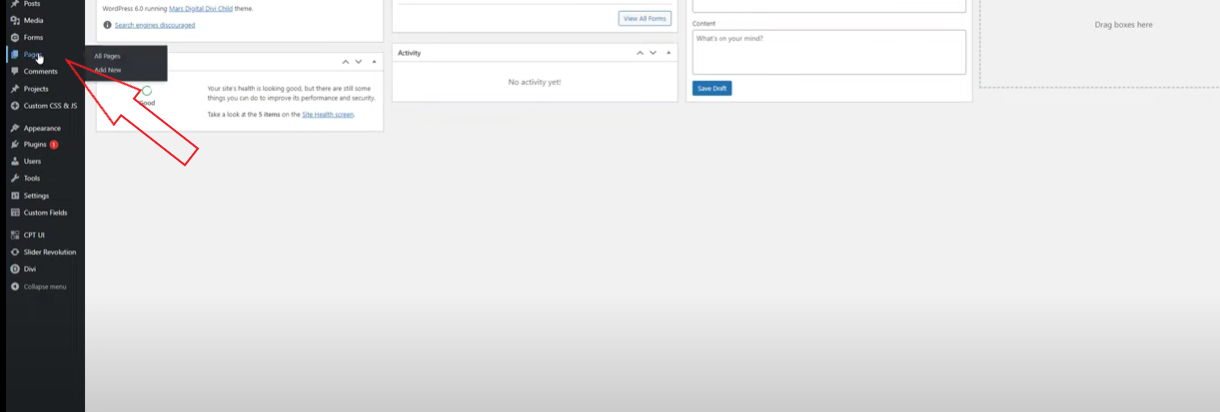
Once you’ve clicked on that, you’ll see this list. So we’ve got three pages that we’ve set up here. And you can see here, this one has front page listed to it.
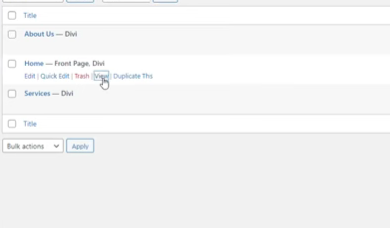
Frontpage means that it’s your home page, that it’s the first page that someone will see when they go to your website. So when you hover over this, for example, you’ve got a few different options. You can see I’ve got Edit, Click, Edit, Trash, View, and duplicate this.
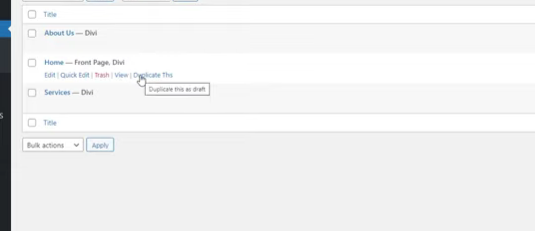
Duplicate this will mean that I basically clone the whole page and create it as a draft. So that will be useful if you want to do things like replicate something. If you’ve got the about page but you want to then use that template to talk about a new service, you can duplicate that and then replace the content. Makes creating new pages a lot easier.
How to Edit a Page #
But to edit a page, you’ve got two options. I’m going to focus on the Visual Builder because this is probably the easiest option for you to use and get a grasp of, because it is, as the name suggests, a Visual Builder.
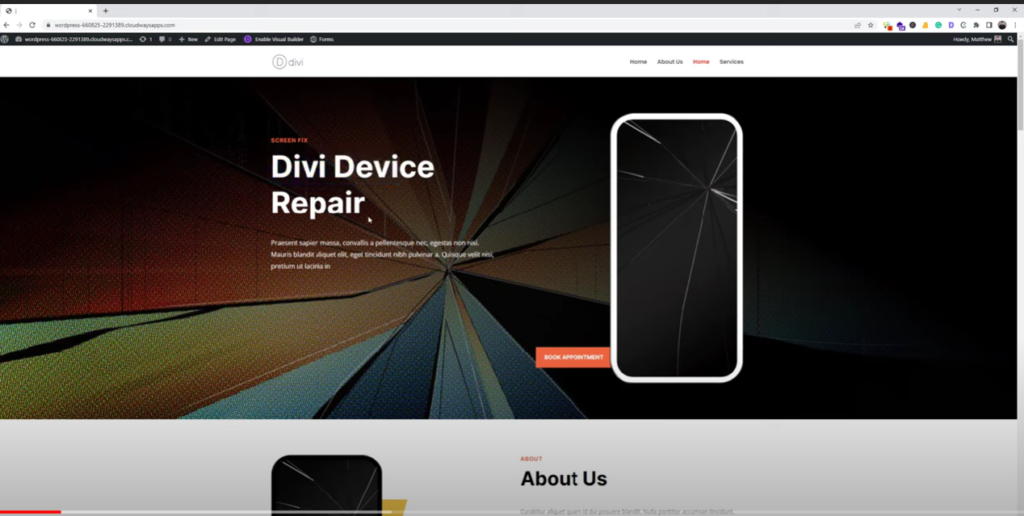
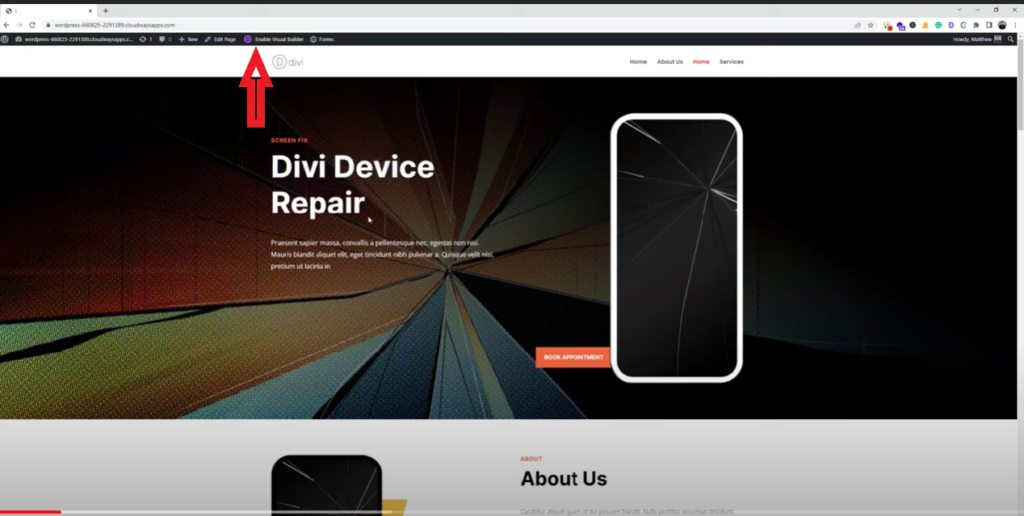
So click on View, you’ll be redirected to the front page of your website or that particular page. You can see here I’m using a fake website called Divi Device Repair. It’s obviously all about a mobile repair business, cracked screens, that sort of thing. See here, we’ve got the background image. We’ve got an image there. We’ve got a book button, got some text. If I scroll down, we’ve got some more images, some more text. We got a services section. We’ve got some kind of more imagery and text. Kind of the why too, or why you should buy from a section and it just repeats.
you’ll be redirected to the front page of your website or that particular page. You can see here I’m using a fake website called Divi Device Repair. It’s obviously all about a mobile repair business, cracked screens, that sort of thing. See here, we’ve got the background image. We’ve got an image there. We’ve got a book button, got some text. If I scroll down, we’ve got some more images, some more text. We got a services section. We’ve got some kind of more imagery and text. Kind of the why too, or why you should buy from a section and it just repeats.
So now that I’m on this page, I’m going to click on this button here. You got the purple D that says Enable Visual Builder. Click on that and it’s going to reload this page, but with some extra features.
So now that it’s reloaded, you can see here automatically. We’ve got this blue box and that highlights what’s called a section. Section allows us to basically confine particular elements. And then within a section you’ll have a row. So this is the green box and then within each row they can be split into columns. So we have a column here and you might be able to just see this faint line where my mouse is. And then within each column you can have different components or different modules
 .
.
And that’s what this text box, this text box, this text box and there’s image and button. If I scroll down, you can see this about section when I click on it. Big blue box around here. So that’s another section. We then got a row that is split into two columns and then has multiple modules inside. Keep scrolling down. You’ll see it’s very much the same here. Multiple columns within sections.
This one here is a little bit of a special case. So this is a special section or a special row, whatever you want to really call it. It’s technically a section.

What it does, it allows us to have this part right here as a full-height section. But this to be split up into different rows or different components and allows us to add some interesting flair.
You don’t really need to worry about this. We don’t need that too often. What I am going to show you now is how to change text on your website.
How to change Text on your Website #
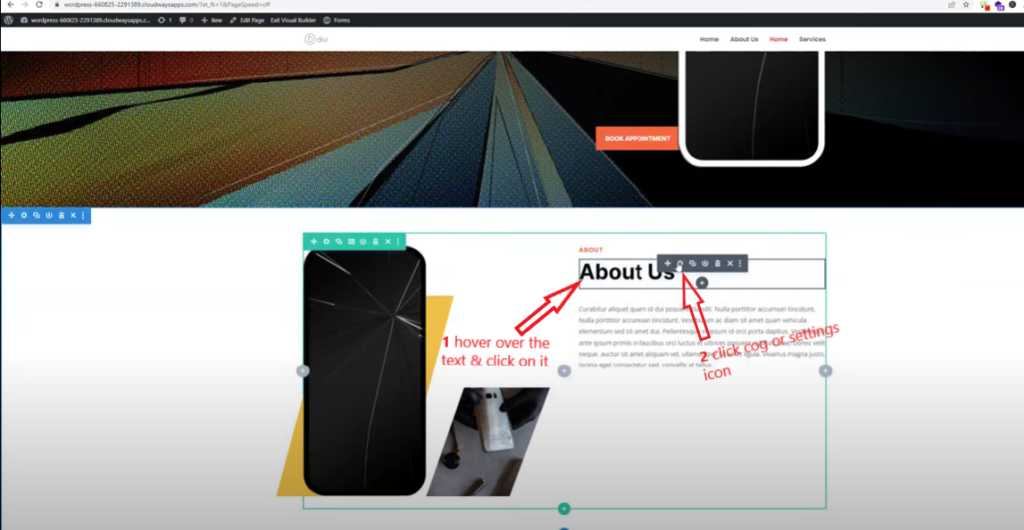
So when you’ve got a section like this here, the About US. Let’s say we want to change this About US content, particularly starting with About US, we’re going to change that to About Divi Repair. So I’ve got a couple of options actually.
First of all, when I hover over the words About Us, I can click on it once and you’ll see this come up, I can click on the cog and that’s going to open a little pop-up and then I can start typing.
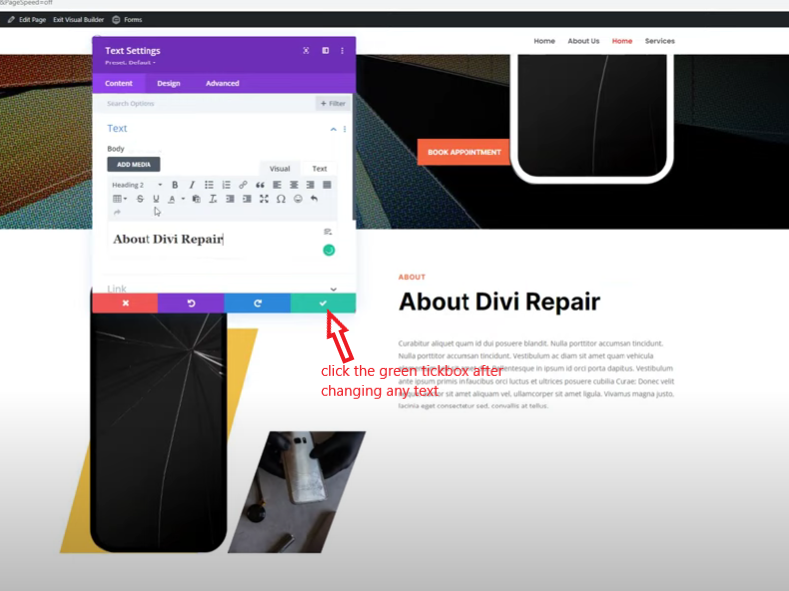
All right. So now I’m typing it’s applied that same structure to the text that I’ve typed. When I’m happy with it, I can click on this green tick here. That saved it as far as the visual builder is concerned, but it hasn’t published it.
The other way I can do it is I can click and I can click again or just double click to start with and then it’s like typing in Microsoft Word for example, I can use arrow keys. I can click around here and here and I can go Divi Device Repair. Right now I can click off that. And again, that’s just like it’s been saved. Now, let’s say I want to change this text. I’m going to hover over again. I’m going to jump into the cog and we’re just going to add another couple of random words. Doesn’t mean anything at the beginning.
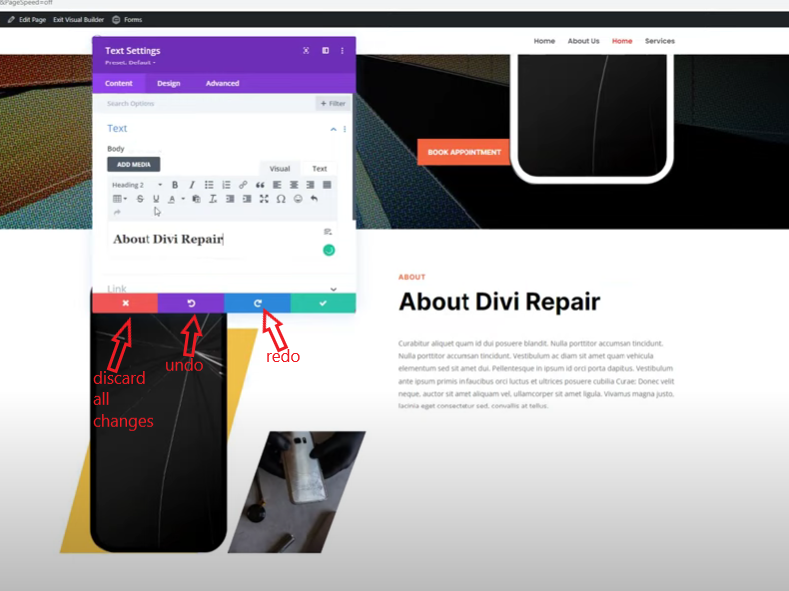
Now, if I decide I don’t actually want to save these changes, I messed up. I do have an undo bin and a redo bin. Or I could click on the X. So this X means that any changes I’ve made will disappear. So you’ll see, these first two words will disappear. Boom! done. If I jump back in there, I can also look at things like adding a link to the pages.
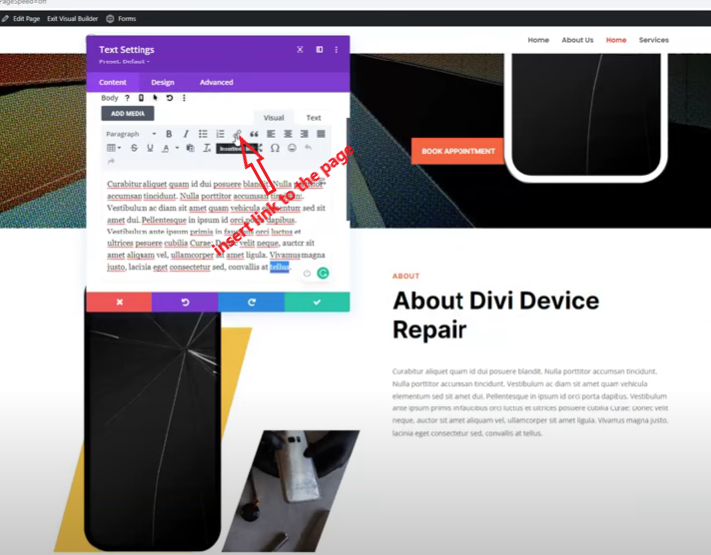
Adding a link to a page #
So let’s say that’s to do with the about page or says Read more. I can highlight that text here. And looking up here, insert link. Click on that. Got an option to go US because it’s at the About US page. And okay, and then green tick. There it is, there. So that is now linked to the About US page.
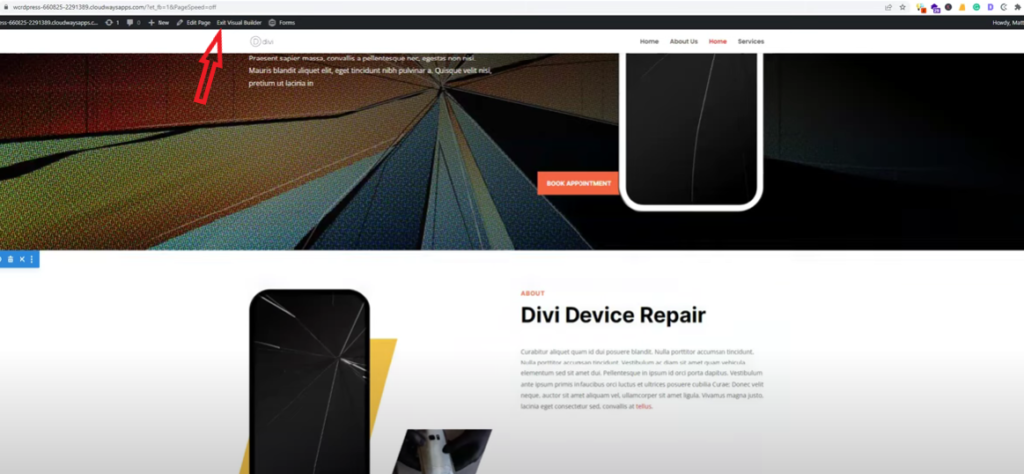
Now, if I’m happy with these changes, I need to look down here where we’ve got the purple circle and three dots. Click on that. You’ll see that menu expands. I can come across to this green button here where it says Save. I want to click on that. You’ll see the circle and the tick. And now it goes back to the word save. So that’s perfect. Now I can click on Exit Visual Builder and I’ll be able to see these changes live.


Boom! There it is. Divi Device Repair. And a link. Click on that. It goes through to the About US page.
If you messed up doing changes #
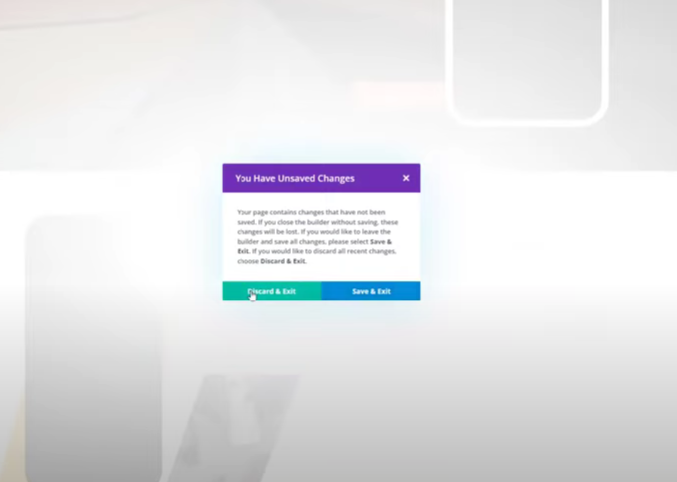
Now, if I was to make some changes on this page and I haven’t accidentally well, for some reason, I haven’t saved it.
So let’s say I’m going to get rid of about, right? That’s a mistake. I haven’t changed it. I haven’t hit the save button. Or maybe it is not a mistake, but I click on Exit Visual Builder up top. Now, I get this pop up here that says you have unsaved changes. You can discard or you can save or you can ignore the whole thing and just click the little X button. And if I click it again without saving, I’ll get the same thing here and I can go save and exit. Or in this case, I’m going to click discard. And there it is! About is back.
So that’s how you make some changes quickly to text. And in future videos, I will go over how to update images as well as these sort of buttons, and how to do a lot more within the Visual Builder.